Debian10にVNCをインストールして設定する方法
序章
Virtual Network Computing (VNC)は、キーボードとマウスを使用してリモートサーバー上のグラフィカルデスクトップ環境と対話できるようにする接続システムです。 It helps users who are not yet comfortable with the command line with managing files, software, and settings on a remote server.
このガイドでは、Debian 10サーバー上にVNCサーバーをセットアップし、SSHトンネルを介して安全に接続します。 高速で軽量なリモコンパッケージであるTightVNCを使用します。 This choice will ensure that the VNC connection will be smooth and stable even on slower internet connections.
前提条件
To follow this tutorial, you’ll need:
- Debian10初期サーバーセットアップガイドに従ってセットアップされた1台のDebian10サーバー。
sudoアクセスとファイアウォール。 - SSHトンネルを介したVNC接続をサポートするVNCクライアントがインストールされたローカルコンピューター。
Once you have everything set up, you can proceed to the first step.
ステップ1—デスクトップ環境とVNCサーバーをインストールする
By default, a Debian 10 server does not come with a graphical desktop environment or a VNC server installed, so begin by installing those. Specifically, install packages for the latest Xfce desktop environment and the TightVNC package available in the official Debian repository.
サーバーで、パッケージのリストを更新します。
- sudo apt update
Now install the Xfce desktop environment on your server:
- sudo apt install xfce4 xfce4-goodies
インストール中に、可能なオプションのリストからキーボードレイアウトを選択するように求められます。 あなたの言語に適したものを選択し、を押してください Enter. インストールは続行されます。
インストールが完了したら、TightVNCサーバーをインストールします。
- sudo apt install tightvncserver
インストール後にVNCサーバーの初期構成を完了するには、 vncserver 安全なパスワードを設定し、初期構成ファイルを作成するコマンド:
- vncserver
Next there will be a prompt to enter and verify a password to access your machine remotely:
OutputYou will require a password to access your desktops.

Password:
Verify:
パスワードは6〜8文字の長さである必要があります。 Passwords with more than eight characters will be truncated automatically.
Once you verify the password, you have the option to create a view-only password. 表示専用パスワードでログインするユーザーは、マウスまたはキーボードでVNCインスタンスを制御することはできません。 これは、VNCサーバーを使用して他の人に何かをデモンストレーションしたい場合に便利なオプションですが、必須ではありません。
次に、プロセスはサーバーに必要なデフォルトの構成ファイルと接続情報を作成します。
OutputWould you like to enter a view-only password (y/n)? n
xauth:  file /home/sammy/.Xauthority does not exist

New 'X' desktop is your_hostname:1

Creating default startup script /home/sammy/.vnc/xstartup
Starting applications specified in /home/sammy/.vnc/xstartup
Log file is /home/sammy/.vnc/your_hostname:1.log
Next, configure it to launch Xfce and give access to the server through a graphical interface.
ステップ2—VNCサーバーの構成
VNCサーバーは、起動時に実行するコマンドを知る必要があります。 具体的には、VNCは接続するグラフィカルデスクトップを知る必要があります。
これらのコマンドは、という構成ファイルにあります。 xstartup の中に .vnc ホームディレクトリの下のフォルダ。 起動スクリプトは、を実行したときに作成されました vncserver command in the previous step, but you’ll create your own to launch the Xfce desktop.
VNCが最初にセットアップされるとき、ポートでデフォルトのサーバーインスタンスを起動します 5901. このポートはディスプレイポートと呼ばれ、VNCでは次のように呼ばれます。 :1. VNCは、次のような他のディスプレイポートで複数のインスタンスを起動できます。 :2, :3、 等々。
Because you are going to be changing how the VNC server is configured, first stop the VNC server instance that is running on port 5901 次のコマンドを使用します。
- vncserver -kill :1
The following is the output with a PID specific to your server environment:
OutputKilling Xtightvnc process ID 17648
変更する前に xstartup file, back up the original:
- mv ~/.vnc/xstartup ~/.vnc/xstartup.bak
今すぐ新しいを作成します xstartup file and open it in your preferred text editor:
- nano ~/.vnc/xstartup
このファイルのコマンドは、VNCサーバーを起動または再起動するたびに自動的に実行されます。 You need VNC to start your desktop environment if it’s not already started. Add the following commands to the file:
#!/bin/bash
xrdb $HOME/.Xresources
startxfce4 &
Here is a brief overview of what each line is doing:
-
#!/bin/bash: The first line is a shebang. In executable plain-text files on *nix platforms, a shebang tells the system what interpreter to pass that file to for execution. In this case, you’re passing the file to the Bash interpreter. This will allow each successive line to be executed as commands, in order. -
xrdb $HOME/.Xresources: This command tells VNC’s GUI framework to read the user’s.Xresourcesファイル。.Xresourcesis where a user can make changes to certain settings for the graphical desktop, like terminal colors, cursor themes, and font rendering. -
startxfce4 &: This command tells the server to launch Xfce. This is where you will find all the graphical software that you need to comfortably manage your server.
When you’re finished, save and exit out of your editor. If you’re using nano, you do so by pressing CTRL+X, then Y, then ENTER.
To ensure that the VNC server will be able to use this new startup file properly, you need to make it executable:
- sudo chmod +x ~/.vnc/xstartup
Now, restart the VNC server:
- vncserver
The output will be similar to the following:
OutputNew 'X' desktop is your_hostname:1

Starting applications specified in /home/sammy/.vnc/xstartup
Log file is /home/sammy/.vnc/your_hostname:1.log
With the configuration in place, you’re ready to connect to the VNC server from your local machine.
ステップ3—VNCデスクトップを安全に接続する
VNC自体は、接続時に安全なプロトコルを使用しません。 To connect securely, you’ll use an SSH tunnel to connect to your server, and then tell your VNC client to use that tunnel rather than making a direct connection.
ローカルコンピュータにSSH接続を作成し、安全に転送します。 localhost VNCの接続。 You can do this via the terminal on Linux or macOS with the following command. 交換することを忘れないでください sammy と your_server_ip with your non-root username and the IP address of your server:
- ssh -L 5901:127.0.0.1:5901 -C -N -l sammy your_server_ip
Please note there is no output returned after you run this command in your terminal on your local machine. You will have to use a VNC client to view the graphical interface.
Here’s what this ssh command’s options mean:
- The
-Lswitchはポートバインディングを指定します。 In this case you’re binding port5901ポートへのリモート接続の5901on your local machine. - The
-Cswitch enables compression to help minimize resource consumption and speed things up. - The
-Nスイッチは伝えますsshthat you don’t want to execute a remote command. - The
-lswitchは、リモートログイン名を指定します。
If you are using PuTTY to connect to your server, you can create an SSH tunnel by right-clicking on the top bar of the terminal window, and then select the Change Settings… option:
Find the Connection branch in the tree menu on the left-hand side of the PuTTY Reconfiguration window. Expand the SSH branch and click on Tunnels. On the Options controlling SSH port forwarding screen, enter 5901 as the Source Port and localhost:5901 as the Destination, like in the following:
Then click the Add button, and then the Apply button to implement the tunnel.
トンネルが実行されたら、VNCクライアントを使用して接続します localhost:5901. You’ll be prompted to authenticate using the password you set in Step 1.
Once you are connected, the default Xfce desktop will appear as follows:

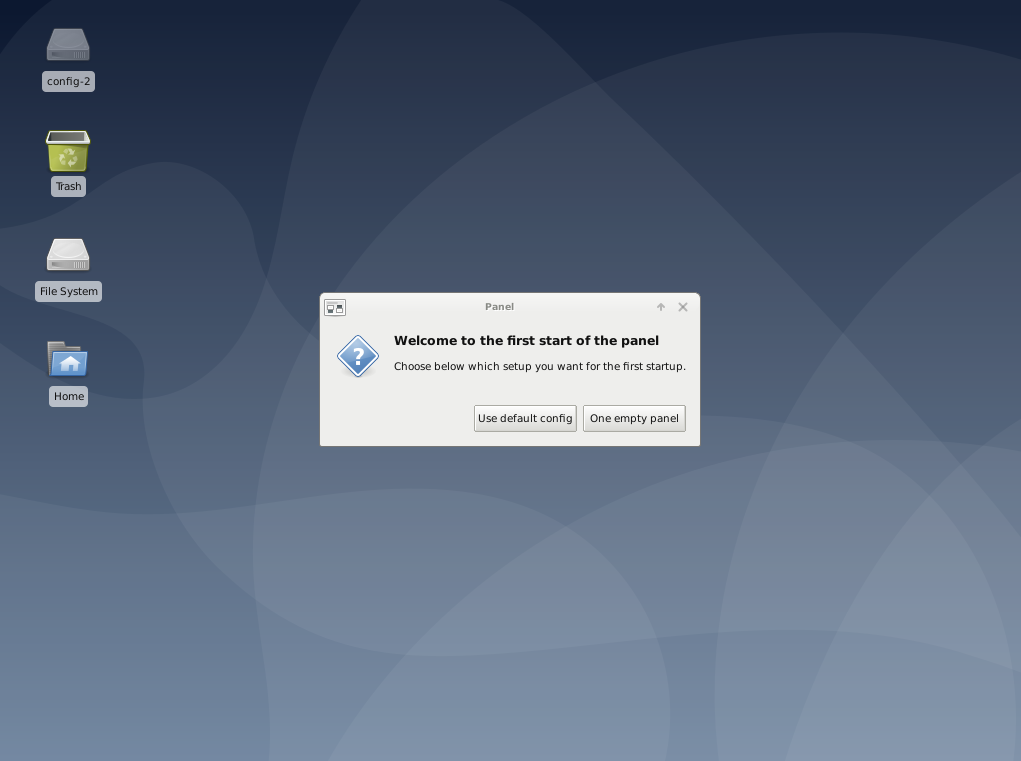
Select Use default config to configure your desktop.
You can access files in your home directory with the file manager or from the command line, as shown here:
ローカルマシンで、を押します CTRL+C ターミナルでSSHトンネルを停止し、プロンプトに戻ります。 This will disconnect your VNC session.
Next, you will set up the VNC server as a service.
ステップ4—VNCをシステムサービスとして実行する
Next, you’ll set up the VNC server as a systemd service. You can start, stop, and restart it as needed, like any other service. これにより、サーバーの再起動時にVNCが確実に起動します。
まず、という新しいユニットファイルを作成します /etc/systemd/system/[email protected] お気に入りのテキストエディタを使用する:
- sudo nano /etc/systemd/system/[email protected]
The @ symbol at the end of the name will let you pass in an argument you can use in the service configuration. You’ll use this to specify the VNC display port you want to use when you manage the service.
次の行をファイルに追加します。 User 、 Group 、 WorkingDirectory の値、およびPIDFILEの値のユーザー名をユーザー名と一致するように変更してください。
[Unit]
Description=Start TightVNC server at startup
After=syslog.target network.target

[Service]
Type=forking
User=sammy
Group=sammy
WorkingDirectory=/home/sammy

PIDFile=/home/sammy/.vnc/%H:%i.pid
ExecStartPre=-/usr/bin/vncserver -kill :%i > /dev/null 2>&1
ExecStart=/usr/bin/vncserver -depth 24 -geometry 1280x800 :%i
ExecStop=/usr/bin/vncserver -kill :%i

[Install]
WantedBy=multi-user.target
The ExecStartPre コマンドがすでに実行されている場合、コマンドはVNCを停止します。 The ExecStart コマンドはVNCを開始し、色深度を1280×800の解像度で24ビットカラーに設定します。 ニーズに合わせて、これらのスタートアップオプションを変更することもできます。
Save and close the file when you’re finished.
Next, make the system aware of the new unit file:
- sudo systemctl daemon-reload
Then, enable the unit file:
- sudo systemctl enable [email protected]
The 1 次の @ 記号は、サービスが表示される表示番号を示します。この場合はデフォルトです。 :1 as was discussed in Step 2.
VNCサーバーがまだ実行中の場合は、現在のインスタンスを停止します。
- vncserver -kill :1
次に、他のsystemdサービスを開始するのと同じように開始します。
- sudo systemctl start vncserver@1
You can verify that it started with the following command:
- sudo systemctl status vncserver@1
If it started correctly, the output will be similar to the following:
Output● [email protected] - Start TightVNC server at startup
Loaded: loaded (/etc/systemd/system/[email protected]; enabled; vendor preset: enabled)
Active: active (running) since Fri 2022-08-19 16:21:36 UTC; 5s ago
Process: 24469 ExecStartPre=/usr/bin/vncserver -kill :1 > /dev/null 2>&1 (code=exited, status=2)
Process: 24474 ExecStart=/usr/bin/vncserver -depth 24 -geometry 1280x800 -localhost :1 (code=exited, status=0/SUCCESS)
Main PID: 24482 (Xtightvnc)
. . .
マシンを再起動すると、VNCサーバーが使用可能になります。
SSHトンネルを再度開始します。
- ssh -L 5901:127.0.0.1:5901 -C -N -l sammy your_server_ip
次に、VNCクライアントソフトウェアを使用して新しい接続を確立します。 localhost:5901 マシンに接続します。
結論
これで、Debian10サーバー上でセキュリティで保護されたVNCサーバーが稼働しています。 Now you’re able to manage your files, software, and settings with a user-friendly and familiar graphical interface. You can also run graphical software like web browsers remotely.